Last updated October 9, 2026








Free written scope consultation - allowances, timeline, and change-order rules on paper before a single trade is scheduled
General Contractor Maintenance Schedule: What to Do and When
Here’s a number most remodeled homeowners never hear: roughly 70% of post-construction defects show up within the first six months, and the rest surface before the 18-month mark. Grout cracks, caulk pulling away from a tub flange, a cabinet door that shifted, a roof drain that pools water after the first real rain. In Los Angeles, where dry heat expands stucco and the wet season tests every seal at once, these issues don’t announce themselves. They wait for someone to look. This guide turns that looking into a calendar: what to inspect at 30, 90, 180, and 365 days after your General Contractor services finish, what’s normal versus what’s a warranty claim, and how to stay ahead of water damage, drywall movement, and material failures specific to Southern California construction. By the end, you’ll know exactly what to check, when to check it, and what to do if something’s wrong.
Styles & brands we work with






Quick Answer
A good post-remodel maintenance schedule has four touchpoints: a 30-day walkthrough for visible defects and caulk failures, a 90-day check for settling and mechanical adjustments, a 180-day seasonal inspection for weather-related wear, and a 365-day full review before your contractor’s workmanship warranty expires. In Los Angeles, that means checking stucco seams before the dry season, flat-roof drainage before the first heavy rain, and wood doors and trim for dry-season movement every fall.
Table of Contents
- Why the First Year After a Remodel Matters Most
- The 30-Day Post-Completion Walkthrough: What to Check Before Your Warranty Window Closes
- The 90-Day Check: Settling, Shifting, and Mechanical Adjustments
- The 180-Day Seasonal Inspection: Water, Drainage, and Los Angeles Climate Stress
- The 365-Day Full Review: Beating Your Contractor’s Warranty Deadline
- Manufacturer Warranty vs. Contractor Warranty: What Actually Covers What
- Maintaining New Plumbing Rough-Ins, Electrical Panels, and Structural Connections in Year One
- Common Mistakes to Avoid
- When to Call a Professional
- Frequently Asked Questions
- The Bottom Line
Why the First Year After a Remodel Matters Most
A remodel is never truly finished the day the crew packs up. What you have is a building that has been cut into, reassembled, and put under stress it has never experienced before. New materials expand and contract at different rates than the old ones. Fresh grout cures fully only after weeks. Caulk bonds to surfaces that are still settling. Paint, drywall compound, and even new lumber all go through a year-long cycle of absorbing and releasing moisture as Los Angeles shifts from June gloom to Santa Ana winds to winter rain.
This is not a defect. It is physics. The house moves, and the materials move with it. A hairline crack in a grout line at month three is often just the tile assembly finding its final position. A gap forming where the tub meets the tile at month eleven is a sign the caulk joint failed and water has been getting behind it. Both look similar to an untrained eye. Only one is a warranty issue. The schedule below teaches you to tell the difference, and it gives you the documentation trail to back up any claim you need to file. For related reading, see our guide to General Contractor Warning Signs Every Homeowner Should Know.
We have walked through hundreds of Los Angeles remodels at the one-year mark, and the pattern holds in every neighborhood from Silver Lake to Woodland Hills: homeowners who check on a schedule catch small problems before they become tear-out jobs. Homeowners who check randomly, or never, find out about a failed shower pan from a water stain on the ceiling below.
The 30-Day Post-Completion Walkthrough: What to Check Before Your Warranty Window Closes
Thirty days is your first real look at the work after daily life has resumed. This is not the final punch-list walkthrough. That happens the day the contractor hands you the keys. This is a later, slower inspection, done in your own time, with a flashlight and a notepad, looking for the things that only appear after showers have run, ovens have heated, and doors have opened and closed a few hundred times.
Most contractor warranties, including our Mason Remodeling home standard written guarantee, cover workmanship for a full year, but defects reported early are always easier to remediate than defects reported at month eleven. Here is the complete 30-day checklist:
- Run every faucet, showerhead, and toilet for five full minutes. Watch the cabinet base and the floor around each fixture for water. Check under every sink with a dry paper towel after the five minutes is up. A single drop means a supply line needs a quarter-turn.
- Inspect every caulk joint in wet areas. Look where the tub meets the tile, where the countertop meets the backsplash, and around every shower control plate. Caulk should be fully adhered with no gaps, no lifting edges, and no discoloration.
- Open and close every cabinet door, drawer, and closet door ten times each. Listen for squeaks, feel for resistance, and watch for doors that have drifted out of alignment. Adjustments now take ten minutes. Ignored, they wear hinges prematurely.
- Check every grout line under direct light. Run a flashlight at a low angle across the tile. Hairline cracks in shower walls or floors that see standing water need to be sealed or regrouted. Cracks in dry areas like a kitchen backsplash are often cosmetic but still worth photographing.
- Test every electrical outlet and switch installed or moved during the remodel. Plug a lamp or phone charger into each one. A loose outlet wobbling in the box, or a switch that feels soft when you press it, should be tightened by an electrician.
- Look at every wall seam, corner, and ceiling joint in bright daylight. Drywall cracks at corners of door frames and where new drywall meets old are the most common 30-day finding in Los Angeles remodels, as the house settles and the new mud cures.
- Document everything with photos. Every crack, gap, or blemish. Email them to your contractor’s project manager with your address and the date. A written record is what turns a worry into a work order.
One note on contractors who resist 30-day callbacks: a quality remodeler expects this walkthrough. We schedule a return visit for any 30-day item we are notified about, no charge, no dispute process. If your contractor gave you a verbal “call if anything looks off” and then goes silent, that tells you what your 365-day claim will feel like, too.
The 90-Day Check: Settling, Shifting, and Mechanical Adjustments
Month three is when the structure finishes its first significant settling cycle. In Los Angeles, with its expansive clay soils and sharp wet-to-dry seasonal swings, houses move more than most homeowners expect. New footers compact the soil beneath them. New headers take their final load. Wood framing that was at 16% moisture content during construction dries to 8% or 9% in a dry fall, and every door and drawer in the house feels it.
Here is what to do at day 90:
- Check every door slab in the remodeled area. A door that rubs at the top corner is usually not a hinge problem. It is the wall settling. A door that no longer latches is the same. Both are two-minute fixes with a screwdriver, but only if you flag them now.
- Re-caulk any joint that has separated more than 1/16 of an inch. This is especially true where the kitchen counter meets the tile backsplash and where a free-standing tub meets the floor. In dry Los Angeles air, silicone caulk can shrink back in a way it never does in coastal humidity.
- Check tile and flooring for tapping sounds. Walk every square foot of new tile. A hollow sound means a tile has lost its bond to the thinset. One hollow tile is a simple replacement. Ten hollow tiles is a tear-out, and you want that documented inside the warranty period, not after it.
- Inspect waterproofing edges in showers. The corners where the shower floor meets the wall, and the seam where the glass enclosure meets the tile, are the two highest-risk water intrusion points in any bathroom remodel, and the failure shows up here, at month three, when repeated wet-dry cycles have done their work.
- Test your water heater and rerouted supply lines. If your remodel moved any plumbing, run hot water at every new fixture until it reaches full temperature. Check the water heater closet or garage for drips or corrosion at the new connections.
None of these 90-day items are emergencies. They are adjustments. The difference between a well-built remodel and a headache in year three is whether anyone performs them.
The 180-Day Seasonal Inspection: Water, Drainage, and Los Angeles Climate Stress
The six-month mark in Los Angeles almost always lands near a season change, and that makes it the most important inspection on this calendar. If your remodel wrapped in spring, month six is the first Santa Ana season. If it wrapped in fall, month six is the first sustained heat. Either way, the weather is about to test every exterior seal, every flat-roof drain, and every stucco seam your project touched.
Los Angeles has a specific set of climate stressors that remodels in other regions never face. Our wet season is short but intense, dropping half a year’s rain in six or eight weeks, often onto roofs and drainage systems that have been sitting in dry heat for months. Our dry season shrinks exterior wood, opens stucco hairline cracks, and bakes any sealant that is not UV-stable. Flat roofs, which cover a huge share of post-war Los Angeles homes from the Valley to the Westside, pool water at drains during winter and crack at the seams during summer.
At month six, do this:
- Walk every flat-roof section that was touched by the remodel. Look for standing water, especially around drains and scuppers. If water is still pooled 48 hours after rain, the drain is pitched wrong or clogged. In Los Angeles, a flat roof that holds water in January is a roofing replacement by March.
- Inspect stucco seams, expansion joints, and window surrounds. Stucco expands and contracts dramatically in Los Angeles heat. Hairline cracks that run along a control joint are normal. Cracks that run diagonally across the field of the stucco, or that widen at the top, can indicate a structural problem behind the cladding and should be photographed and reported.
- Re-seal any exterior caulk that is pulling away. Around windows, doors, and any penetration like a vent hood or exterior light fixture. Los Angeles gets fewer deep freezes than other parts of the country, but the UV damage to exterior sealant is among the most aggressive in the nation.
- Check wood doors, trim, and any new fencing or decking for dry-season movement. A wood front door that swelled shut in winter may now have a visible gap at the latch. This is normal movement, but the gap itself is an entry point for pests and drafts, and a quick weatherstripping adjustment solves it.
- Test exterior drainage and any new hardscaping. Run a hose on every new patio, walkway, or planter bed for five minutes and watch where the water goes. It should sheet away from the foundation on all sides. If it pools against the house, or if a new planter bed holds water against stucco, you have a drainage problem that will damage the foundation over time.
For bathroom remodels with new ventilation fans, now is also the time to check that the fan is actually pulling air. Hold a single square of toilet paper up to the running fan. It should hold it in place. A fan that spins but does not pull is just a noise-maker, and in a Los Angeles bathroom without a window, that means moisture is staying in the room and graduating from steam to mold.
The 365-Day Full Review: Beating Your Contractor’s Warranty Deadline
Day 365 is the one that makes this whole schedule worth doing. This is your last chance to file a workmanship claim before the one-year warranty window closes, and it should be treated like a home inspection, not a casual glance. In our experience with home remodeling in Los Angeles, the homeowners who get every defect fixed are the ones who submit a complete, documented list at month eleven or twelve. The homeowners who mention something at month fourteen are the ones who pay out of pocket.
Here is the final-year checklist. This is the longest one on the calendar, so block out half a Saturday:
- Run the full 30-day checklist again from top to bottom. Every faucet, every drain, every cabinet door, every outlet. Things that were perfectly fine at month three have now been through a full wet season and a full dry season.
- Inspect the shower pan and tub surround for any signs of moisture wicking. Discolored grout at the bottom course of wall tile, a musty smell that does not fade, or a loose tile near the drain are the classic signs of a waterproofing failure. These can take ten to twelve months to become visible.
- Look for cracked grout or caulk anywhere water runs. In a shower, a cracked grout line is a direct path for water to reach the substrate. In a kitchen, it is mostly cosmetic, but on a bathroom floor, it is a claim.
- Check the ceiling below any upstairs bathroom you remodeled. Water stains, paint bubbling, or a soft spot in the drywall means a leak has already made its way through. This is the single most common one-year discovery in two-story Los Angeles homes.
- Test every cabinet drawer glide and door hinge for wear. A drawer that has loosened and now rubs against the cabinet face is a ten-minute adjustment. One that is ignored for another year wears the hardware beyond repair.
- Go into the attic or crawl space if your remodel touched structure, roofing, or ventilation. Look for daylight at any new penetration, condensation on ductwork, or disconnected vent lines. We see attic duct separations from remodels more often than any other hidden defect.
- Photograph everything and email the full list to your contractor before day 365. A claim that arrives on day 340 is a work order. A claim that arrives on day 380 is a negotiation. Do not leave it to the last week.
If your remodel was done by a company that stands behind its work, this 365-day review will be calm and businesslike. You send the list, they schedule the fixes, and the year closes with everything right. That is how our 365-Day Done Right Promise works: if something is not right within a year of completion, we make it right at no cost to you. The deadline is real, but the process is not adversarial.
Manufacturer Warranty vs. Contractor Warranty: What Actually Covers What
This is the distinction that confuses more Los Angeles homeowners than any other part of the post-remodel process, and it is worth understanding before you ever need to file a claim.
A contractor warranty covers labor. That means the installation: how the pieces were put together, whether the workmanship was performed to code and to the plans, and whether the finished assembly is sound. Our written guarantee on general contracting work in Los Angeles covers our labor for a full 365 days from the completion date, with clearly stated terms on what is included and what is excluded, and a free return visit if a repair or installation fails.
A manufacturer warranty covers materials. That means the product itself: your faucet, your water heater, your tile, your windows, your HVAC unit. If a Moen shower valve fails in month eight, that is a Moen warranty claim, not a contractor warranty claim. If a tile cracks because the floor was improperly prepared, that is a contractor issue, even if the tile itself is fine.
Here is how to file each one correctly:
- Contractor claims: Document the issue with photos, describe it in writing, and email it to your project manager. A good contractor will send a technician to assess and schedule the fix. You should never pay a service fee for a legitimate workmanship claim within the warranty window.
- Manufacturer claims: You will need the product’s model number, serial number where applicable, proof of purchase, and proof that a licensed contractor performed the installation. Many manufacturers deny claims when a homeowner self-installs or when an unlicensed handyman is used. Keep your remodel contract and your final invoice. They are your installation proof.
- For plumbing fixtures, keep the original cartridges and aerators. A manufacturer will sometimes ask for the failed part to be returned. If you discarded it, the claim slows down or dies.
- For windows, doors, and roofing, register the product warranty within 60 days of installation. Many homeowners never register, and they discover at month ten that the manufacturer’s 20-year warranty was actually a 1-year unregistered warranty.
One thing a written contractor warranty should always state is the duration in plain language. “365 days from the completion date” means something. “Backed by our guarantee” means nothing. Before you sign any remodeling contract, ask to see the exact warranty language, including what is covered, what is not, and what the process is for filing a claim. If the contractor cannot produce it in writing, assume the answer to all three questions is “whatever we feel like.”
Maintaining New Plumbing Rough-Ins, Electrical Panels, and Structural Connections in Year One
Remodels hide most of their most important work behind drywall. The plumbing rough-in, the electrical panel upgrade, and the structural connections that hold the whole assembly together are invisible after the finish work goes up, and most homeowners have no idea they need any attention in the first year. They do. Most early failures in these systems are not defects in materials; they are defects in installation that only become apparent when the house has been lived in for a few months.
Plumbing rough-ins. The joints where new supply lines connect to old ones, and where drain lines were extended or relocated, are the highest-risk points in any bathroom remodel in Los Angeles. In year one, you should periodically listen for the sound of running water when no fixture is on, check your water meter over a two-hour window when no water is being used, and feel the walls behind any new plumbing chase for warmth or dampness. A pinhole leak inside a wall does not flood anything for months, but it grows mold and softens drywall the whole time. The earlier it is caught, the smaller the open-wall repair.
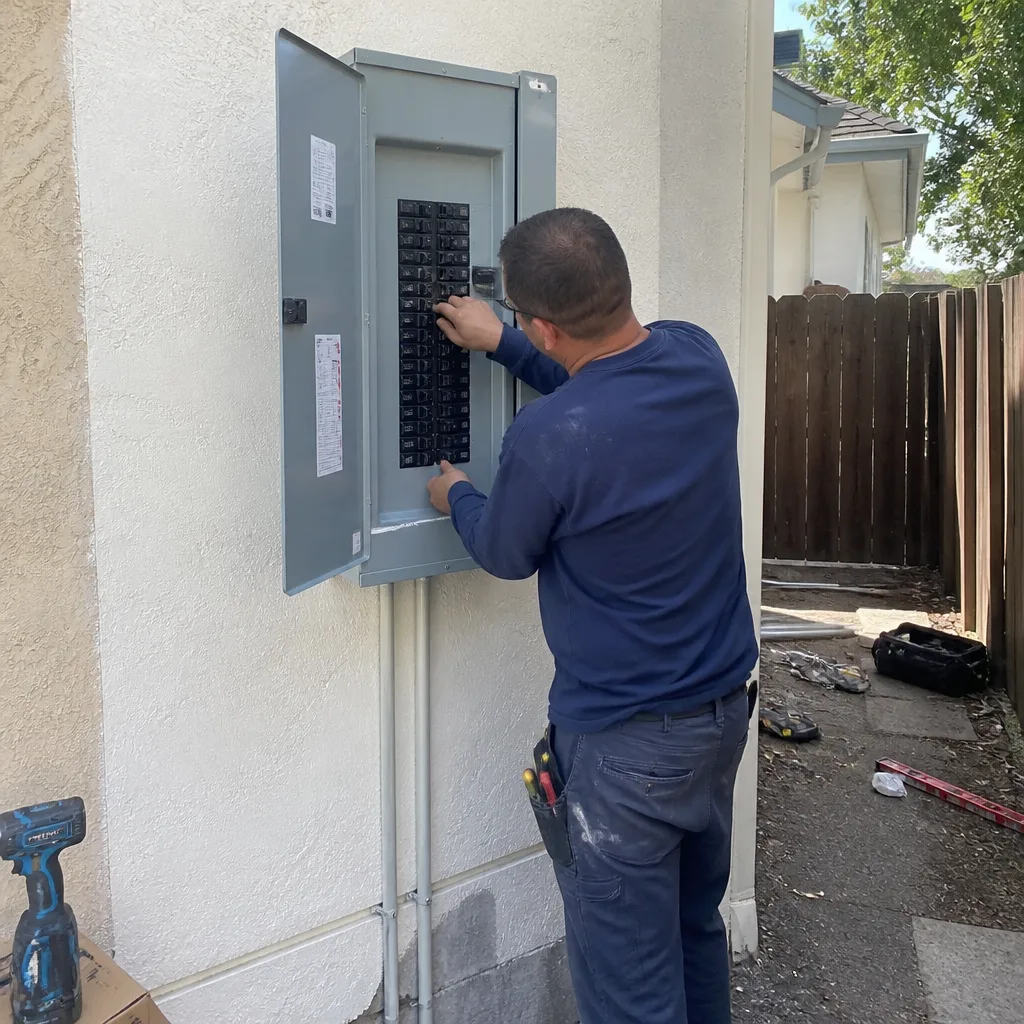
Electrical panels. If your remodel added a subpanel, upgraded your main panel, or added circuits for new appliances, the panel should not be hot to the touch, should not hum at a volume you can hear from across the garage, and should not trip breakers under normal loads. In Los Angeles, where many homes still run on 100-amp panels that were fine in 1962 and are dangerously undersized for a modern kitchen, a panel upgrade is often part of the remodel scope. A properly installed panel is silent and stays cool. Heat, buzzing, or a breaker that trips repeatedly is an electrician callback, not a quirk.
Structural connections. This means the steel straps, anchor bolts, and shear walls that tie the remodeled section of your home to the rest of it. In seismic terms, a remodel is a joint in the house’s skeleton, and Los Angeles is a city that tests that joint regularly. In year one, watch for doors that suddenly stick, drywall cracks that appear in a stair-step pattern across a wall, or a floor that develops a noticeable slope. These are not cosmetic. They can indicate that the new structure is settling unevenly or that a connection was not fully tightened. Any of the three warrants a call to a licensed contractor, and if you are within a year of completion, a call to the original remodeling company.
We have also worked on projects using panelized and prefabricated building components from companies like Boxabl and Plant Prefab, and the same first-year rules apply: the connections between modules, and between the prefab assembly and the site-built foundation, need the same inspection cadence as traditional framing. The technology changes the speed of construction, not the physics of settlement.
Common Mistakes to Avoid
- Waiting until something is visibly broken to inspect it. By the time a shower leak shows up as a stain on the ceiling below, the damage behind the tile is already done. The whole point of a schedule is to find things before they announce themselves.
- Assuming the contractor will check in on you. A good contractor will send a check-in at 30 days and a reminder before the warranty expires. Many do not. The warranty deadline is your responsibility to meet.
- Fixing small things yourself without documenting them. If you re-caulk a joint at month two and it fails again at month ten, you now have a warranty dispute on your hands. Photograph everything before you touch it, and report it before you repair it.
- Filing a manufacturer claim for an installation problem. A cracked tile caused by improper floor prep is not a tile manufacturer issue. Filing the wrong claim wastes months and leaves the real problem unfixed.
- Ignoring exterior drainage because it “looks fine.” In Los Angeles, water is the most destructive force your home faces, and it does most of its damage unseen, against the foundation, behind the stucco, or under the slab.
- Letting the warranty expire without doing the 365-day inspection. This is the one that costs real money. A complete one-year review takes half a day and can surface $10,000 in covered repairs. No other maintenance task on this calendar has a higher return.
When to Call a Professional
Some post-remodel findings are normal and harmless. A hairline crack in drywall at a corner seam, a cabinet door that needs a half-turn on a hinge screw, a faucet aerator that needs cleaning. These are homeowner items. Others are not. Call a professional if you find water staining on any ceiling or wall, a breaker that trips repeatedly, a hollow tile in a wet area, a door that suddenly will not close, a floor that slopes visibly, or any active leak. In earthquake country, stair-step cracks across a wall or a gap that opens between a window frame and the stucco deserves a structural look, not a shrug. Mason Remodeling offers free estimates in Los Angeles, and our written price comes before any work starts. Call (803) 680-2547 and we will tell you what is normal, what is a warranty item, and what, if anything, needs doing.
Frequently Asked Questions
At a minimum, check every wet area (shower, tub, sink, toilet) for leaks or caulk gaps, every door and drawer for alignment, every outlet and switch for function, and every wall and ceiling for cracks. Do a full documented walkthrough at 30 days, then repeat it at 90, 180, and 365 days with the additional items in the sections above.
One year is the standard for quality remodeling work in Los Angeles. Mason Remodeling covers workmanship for a full 365 days from the completion date under our 365-Day Done Right Promise, with a free return visit if a repair or installation fails during that window. Anything shorter than one year should give you pause before you sign.
Hairline cracks in grout lines, especially in dry areas like a kitchen backsplash, are often cosmetic and normal. Cracks that run through the tile itself, hollow-sounding tile in a shower or floor, or grout that is crumbling and falling out are installation defects and should be reported to your contractor immediately, with photos.
Yes, significantly. Los Angeles has a short but intense wet season that tests roofs, drainage, and seals all at once, and a long dry season that shrinks wood, opens stucco cracks, and degrades exterior caulk. Your 180-day inspection should be timed to the season that is about to stress the exterior the most, and your 365-day review should catch anything the full wet-dry cycle has surfaced.
If the faucet itself failed through no fault of the installation (a defective valve, a bad finish), that is a manufacturer warranty claim. If the faucet is leaking because the supply line was not properly tightened or the rough-in was misaligned, that is a contractor workmanship claim. A good contractor will help you diagnose which one you are dealing with.
It depends on the contractor. Some will still address clear workmanship defects as a courtesy, especially if you have a documented record of reporting issues earlier in the year. Others will not. This is exactly why the 365-day walkthrough matters: it is the last point at which the fix is guaranteed rather than negotiated. For anything you find after the window closes, Mason Remodeling still offers free estimates in Los Angeles at (803) 680-2547, and we will give you a written price before any work begins.
The Bottom Line
A remodel is a one-year process, not a one-day event. The work is not done when the dumpster pulls away. It is done when the house has been through a full wet season and a full dry season, and every joint, seal, drain, and connection has proven itself. That takes twelve months of looking, on a schedule, with a camera and a list. The homeowners who do this catch a $200 caulk failure before it becomes a $4,000 water-damage rebuild. The ones who do not find out from a stain on the ceiling. The schedule is simple: 30 days, 90 days, 180 days, 365 days. Put them in your calendar the day your remodel completes, and keep the contractor’s warranty language in writing. For more guides & resources on protecting your investment, visit our blog. When the year is up, you will either have a house that has earned your trust, or a full list of covered repairs and a contractor on the hook to make them right.
Written by Isaac Pruett, Owner at Mason Remodeling, serving Los Angeles since 2004.
See the difference
 Before
 After
After Before
 After
After Before
 After
After